Automatic garden irrigation: TIPS ON ORGANISED PLANT CARE
A garden full of plants is beautiful, especially in summer. Yet this is the time when gardens also require a lot of work to keep them looking this way. Watering systems and compatible water timers make easy work of this – and they even turn worrying about the garden when on holiday into a thing of the past.

How much automation do you need?
People with gardens full of plants face a major challenge, especially in the height of summer: Watering plants regularly and according to their needs. Some people love taking matters into their own hands using spray lances and spray guns. Others would rather spend their free time doing something else. Installing watering systems could end their predicament. Initial planning and installation may prove costly, yet the amount of free time gained from this is priceless. And when you are on holiday, any worries about the garden can simply be cast aside.
A good starting point: Watering systems
Installing a watering system in the entire garden can help deliver targeted moisture to hedges, flowerbeds, shrubs and herbs. When used sensibly, it can water plants individually and according to their needs. The main component of this kind of watering system is a special hose, which can be lengthened or shortened and fitted with micro spray nozzles depending on your requirements. To get you started, we recommend buying a starter kit, which includes a hose as well as a filter, various connection parts and nozzles.
Make sure to lay the hose in such a way that all garden areas that need watering are covered. Position the micro spray nozzles at points on the hose where you want water to be dispersed later. Depending on the type of nozzle used, you can water plants at an angle of 90, 180 or 360 degrees. And you can even regulate the volume of water used to suit your requirements. In addition to micro spray nozzles, you can also use drip nozzles, which slowly release water from the hose in drops. You can use sealing collars to seal the hose in places that no longer require watering. A special trickle hose is suitable for slow-release watering of hedges and shrubs, for example.
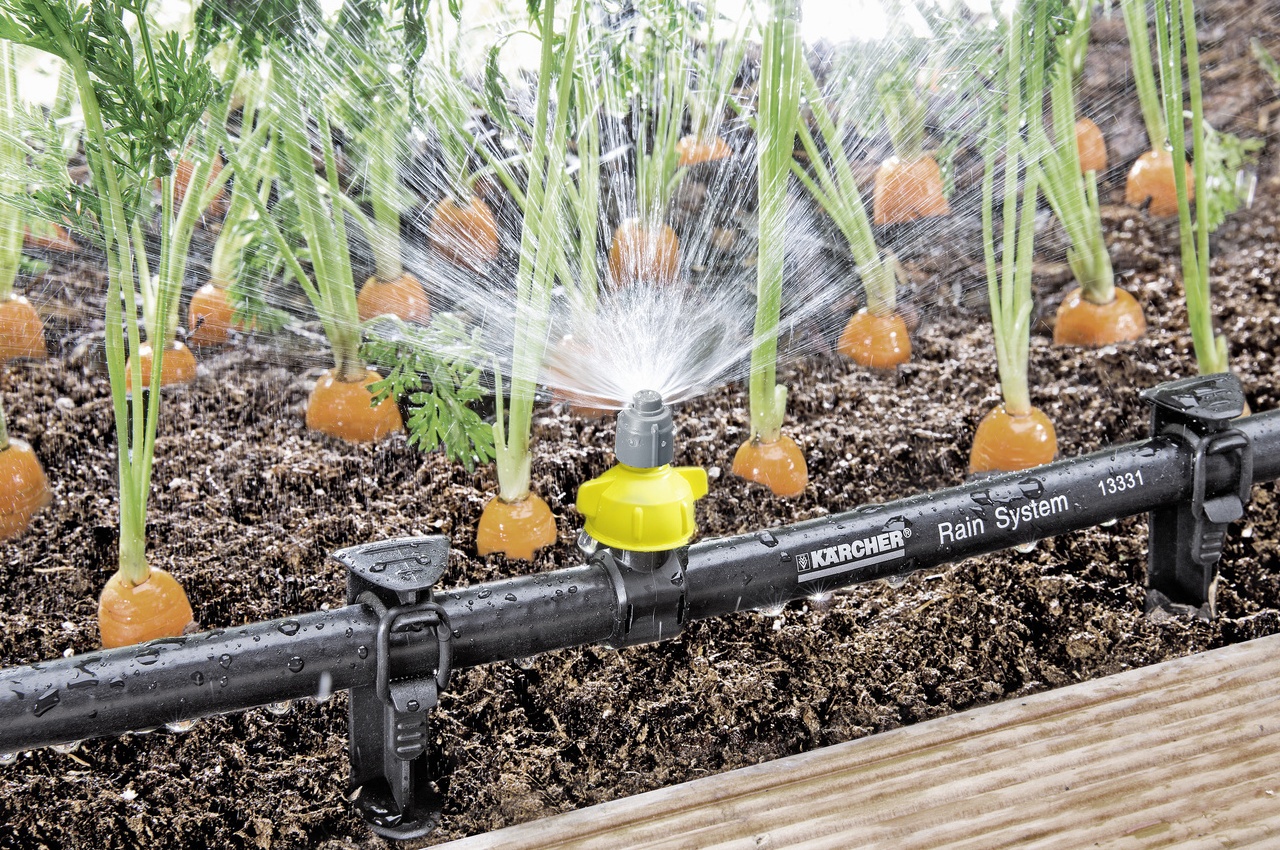

Lay the hose in the garden in such a way that it can reach all plants needing watering. If the hose is too long, you can shorten it using a pair of scissors.

Extend the watering system to your heart's content using a connection set with T- and I-connectors as well as hose stops. Connecting a second system is also possible.

Use the hose stop to seal off the (trickle) hoses securely. Simply fit it to the end of the relevant hose with no tools required.

A particle filter must be fitted to the start of the hose. It prevents small dirt particles entering the system and can easily be removed and cleaned.
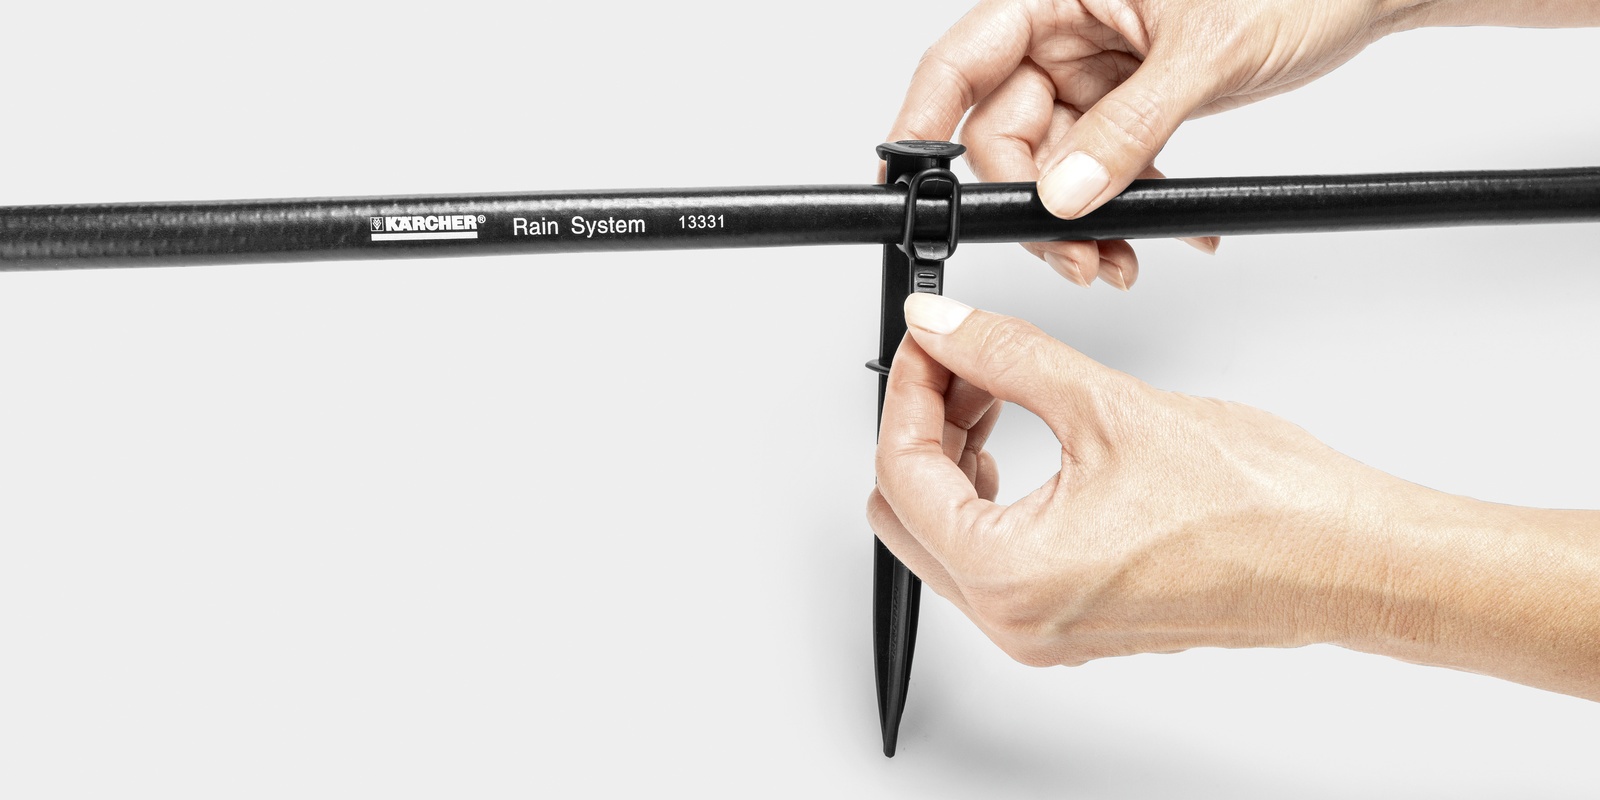
Use hose spikes to fix the hose in the ground. The attachment points on the spikes feature integrated rubber rings which provide optimal hold.
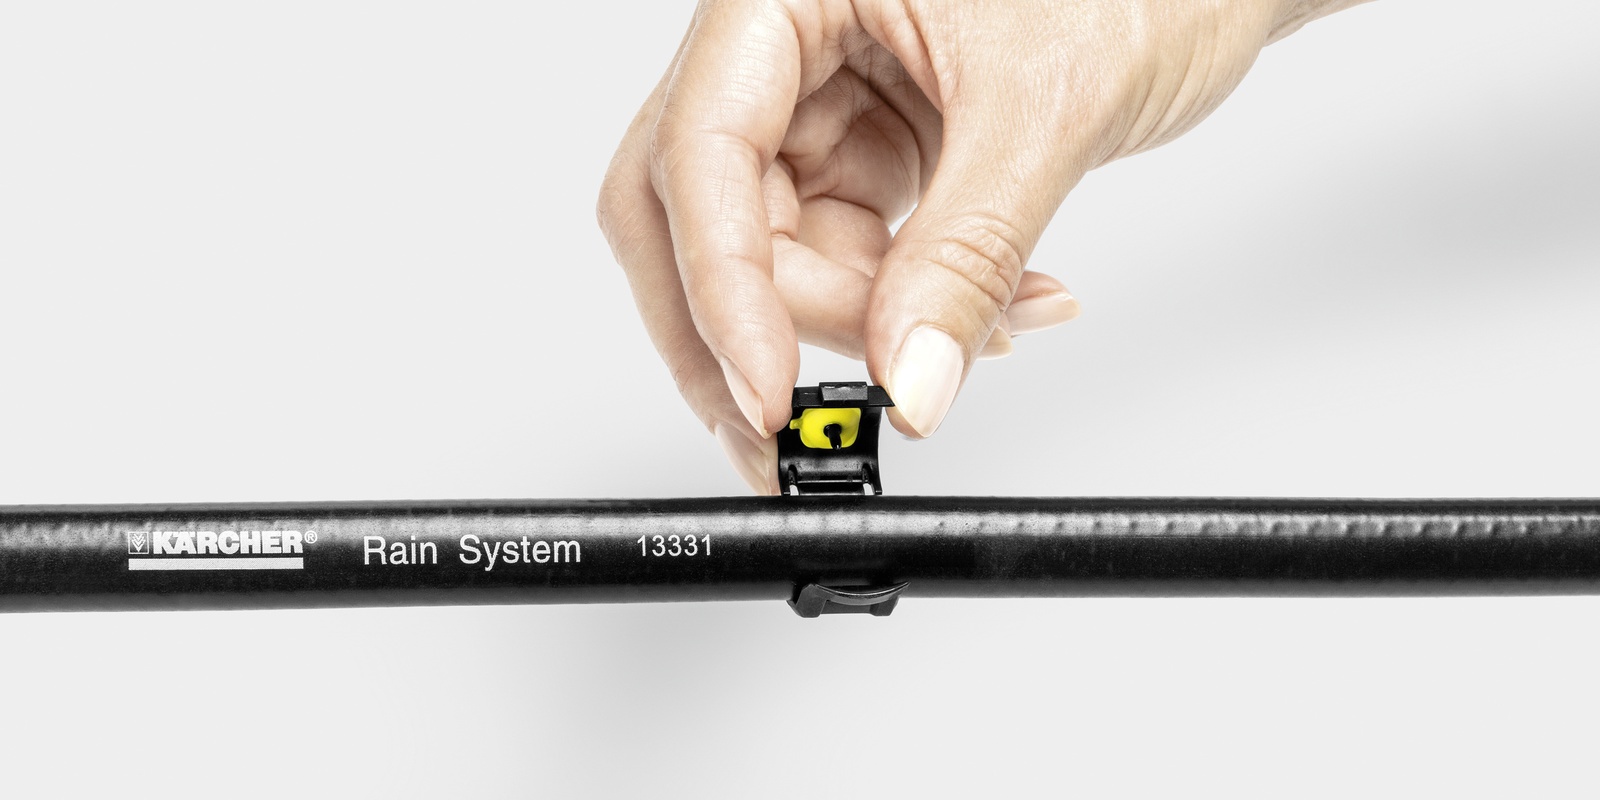
To fit micro spray nozzles, simply stick the open nozzles' integrated needle into the hose and close them to hold them in place.
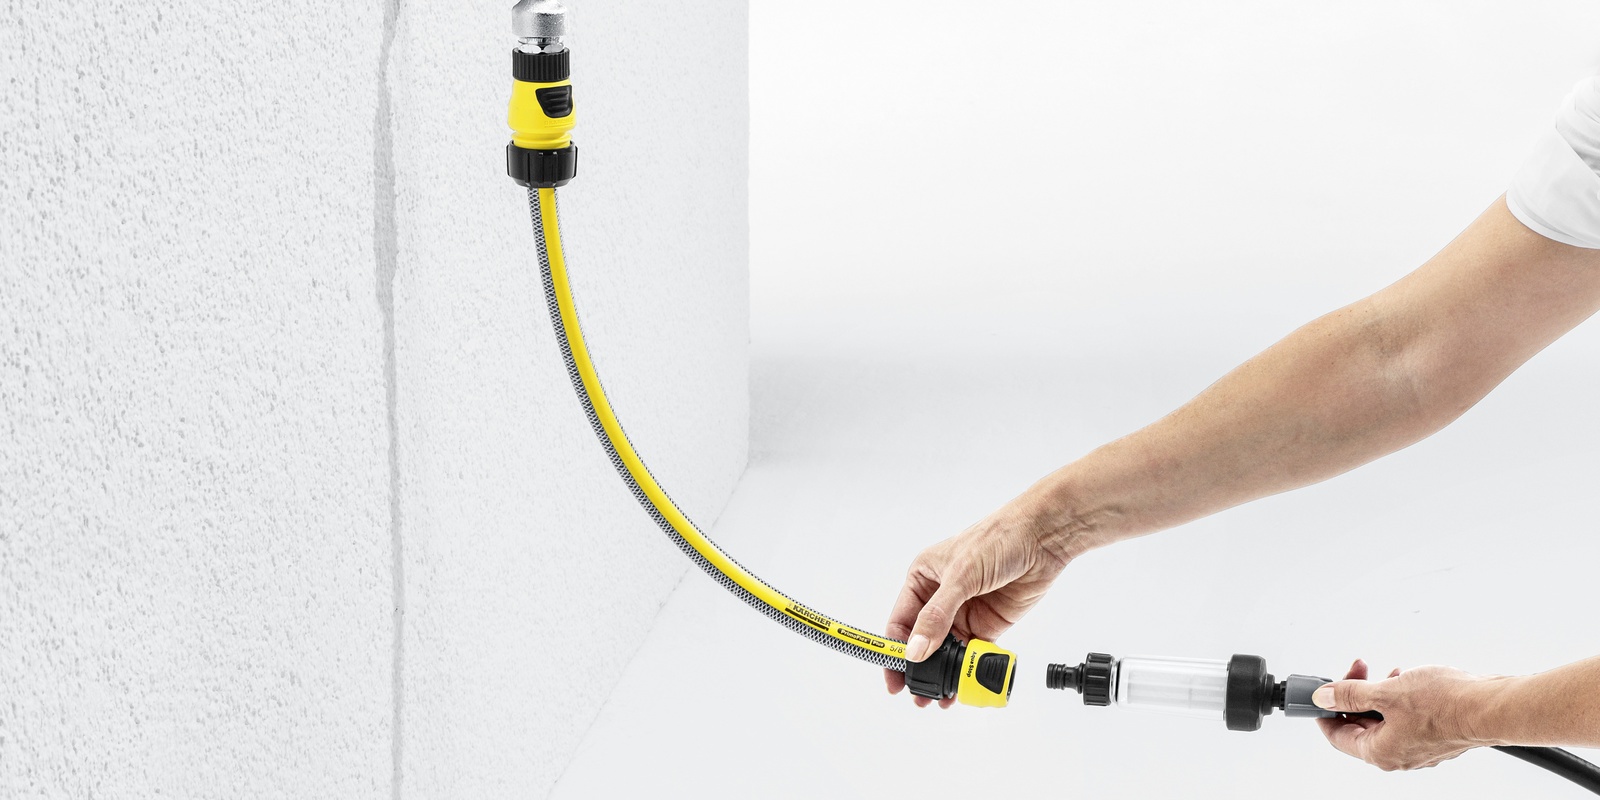
Use the particle filter's tap adapter to connect the watering system to the water supply. It is compatible with all known click systems.
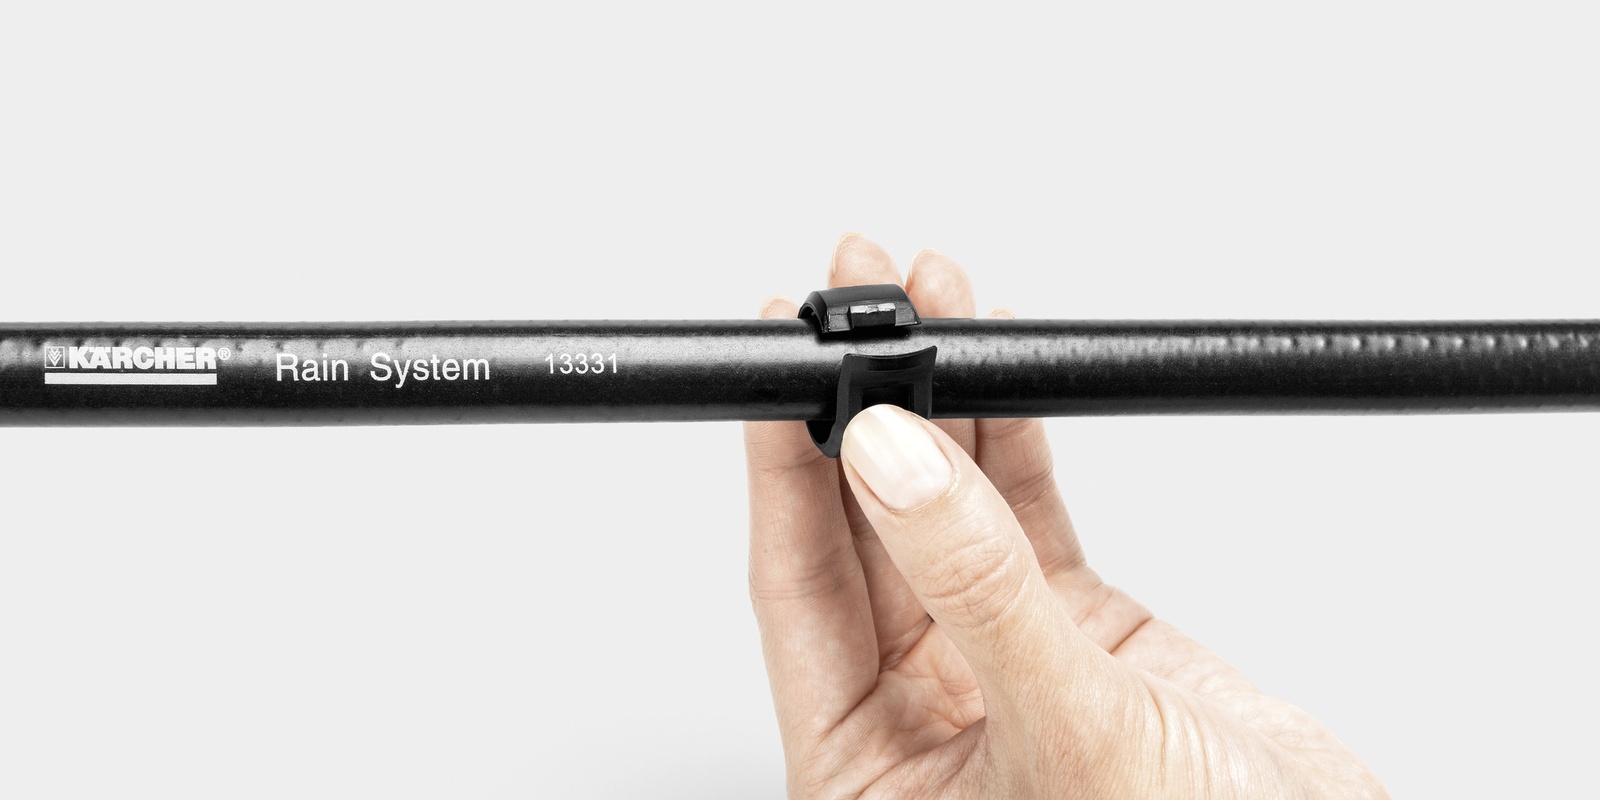
Use sealing collars to seal nozzle holes that are no longer needed. To do this, stick the integrated pin into the hole you want to seal and close the nozzle.
Important note:
You should dismantle the watering system, especially the nozzles and connectors, before winter. The trickle hose can remain in the garden over winter provided it has been drained of water beforehand. This is especially practical if the hose has been buried under a layer of bark mulch. Make sure to keep a detailed drawing of the garden, the beds and the plants to make reassembling the system in the spring easier. The drawing should also detail where exactly hoses were placed and where nozzles were positioned.

Self-service for plants: Water timers
Supplying plants with water using the installed watering system can be done manually or using water timers. Simply connect these between the water supply to your home and the watering system. Depending on the model, water timers feature low to high degrees of automation – from a simple clock to a sensor control system:
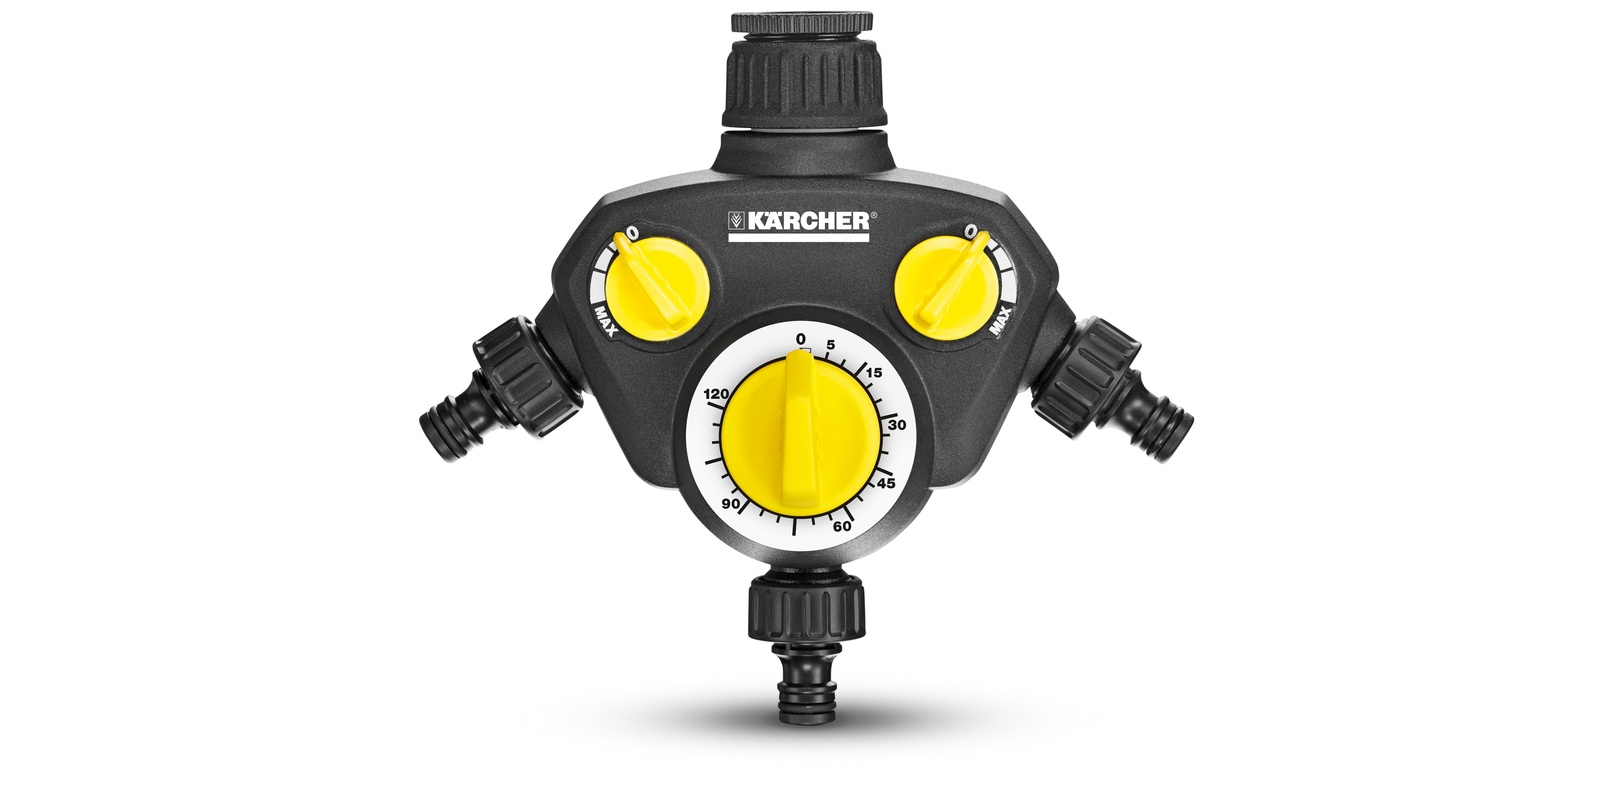
WT 2 Watering Clock
The WT 2 has two tap adapters with independent, continuously variable controllers. A watering clock is integrated in the third tap connector, which allows the watering time to be set continuously up to 120 min. Watering stops automatically once the set time has elapsed.
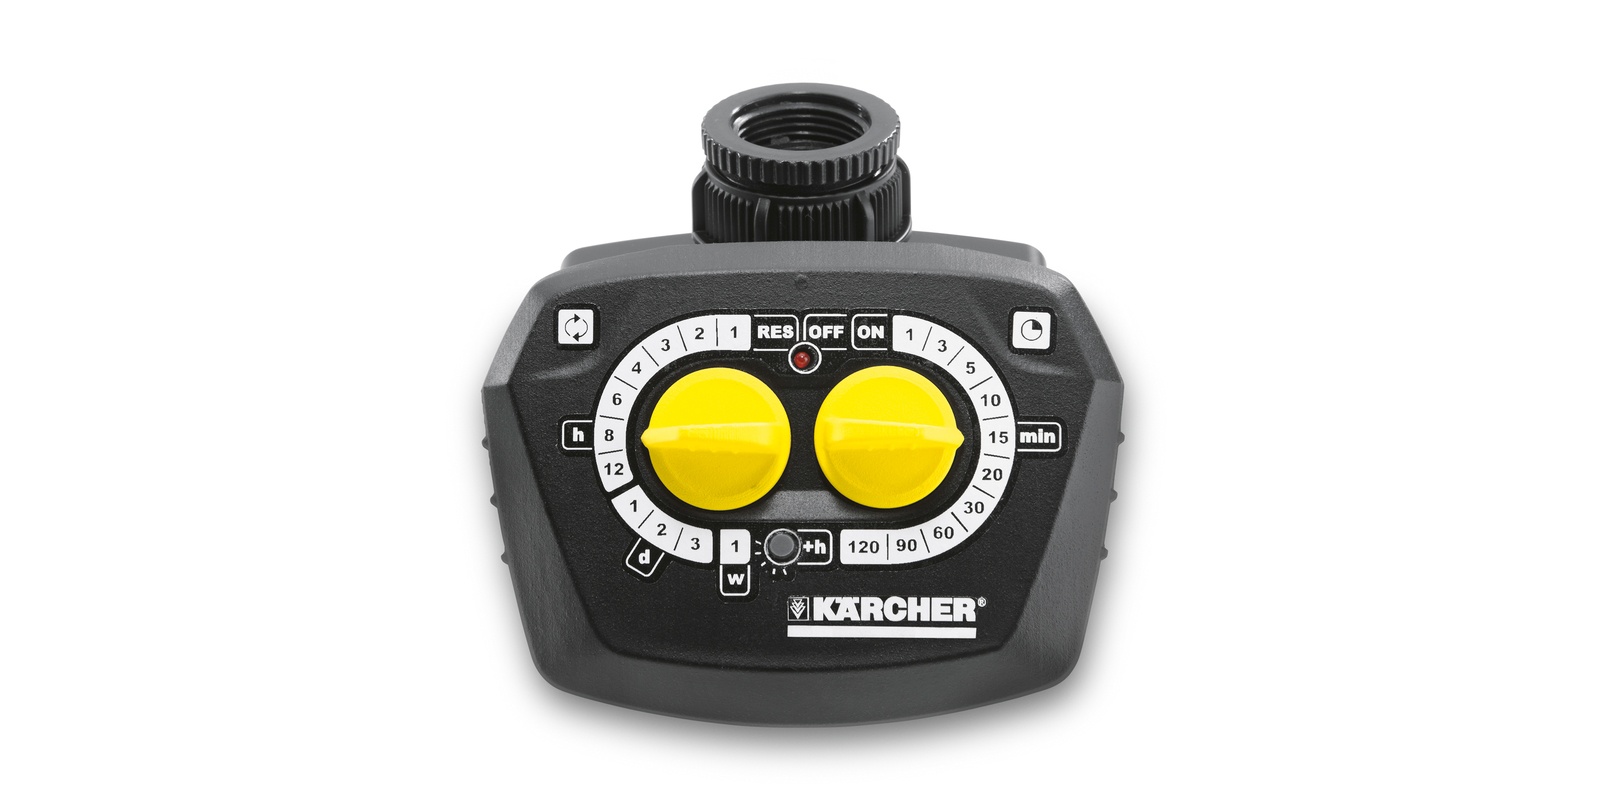
WT 4 water timer
You can program the watering time and duration as necessary using the WT 4 water timer. The watering duration is limited to a maximum of 120 minutes. Watering stops and starts on time and automatically at the preset time.
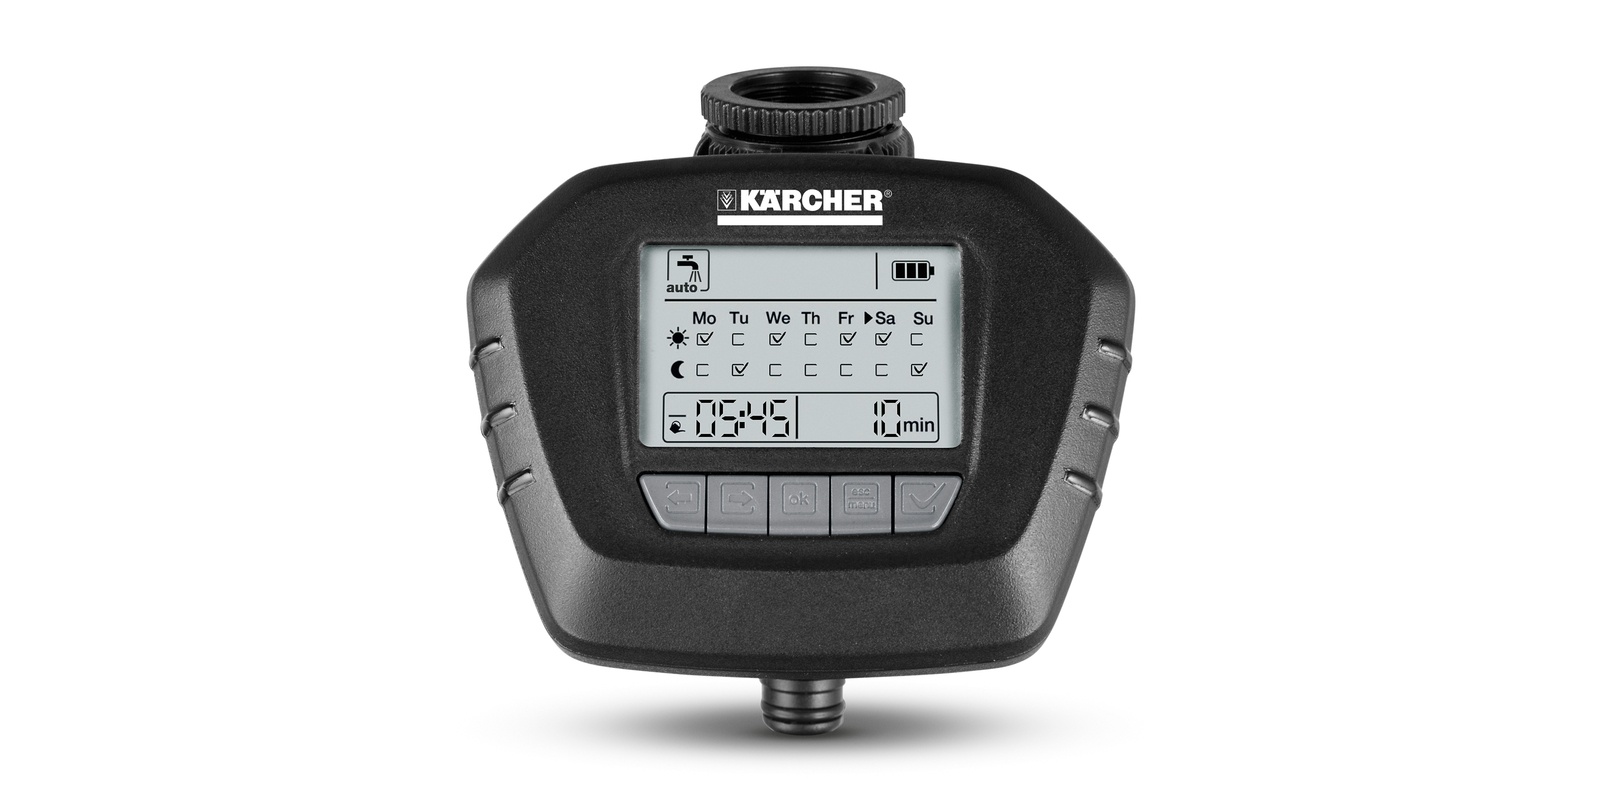
WT 5 Water Timer
The WT 5 has four modes: Automatic watering, manual watering, countdown watering, and 24-hour break function. In automatic watering mode, it waters plants at the programmed times (programmable for each day of the week, up to two cycles) with the previously set watering duration.
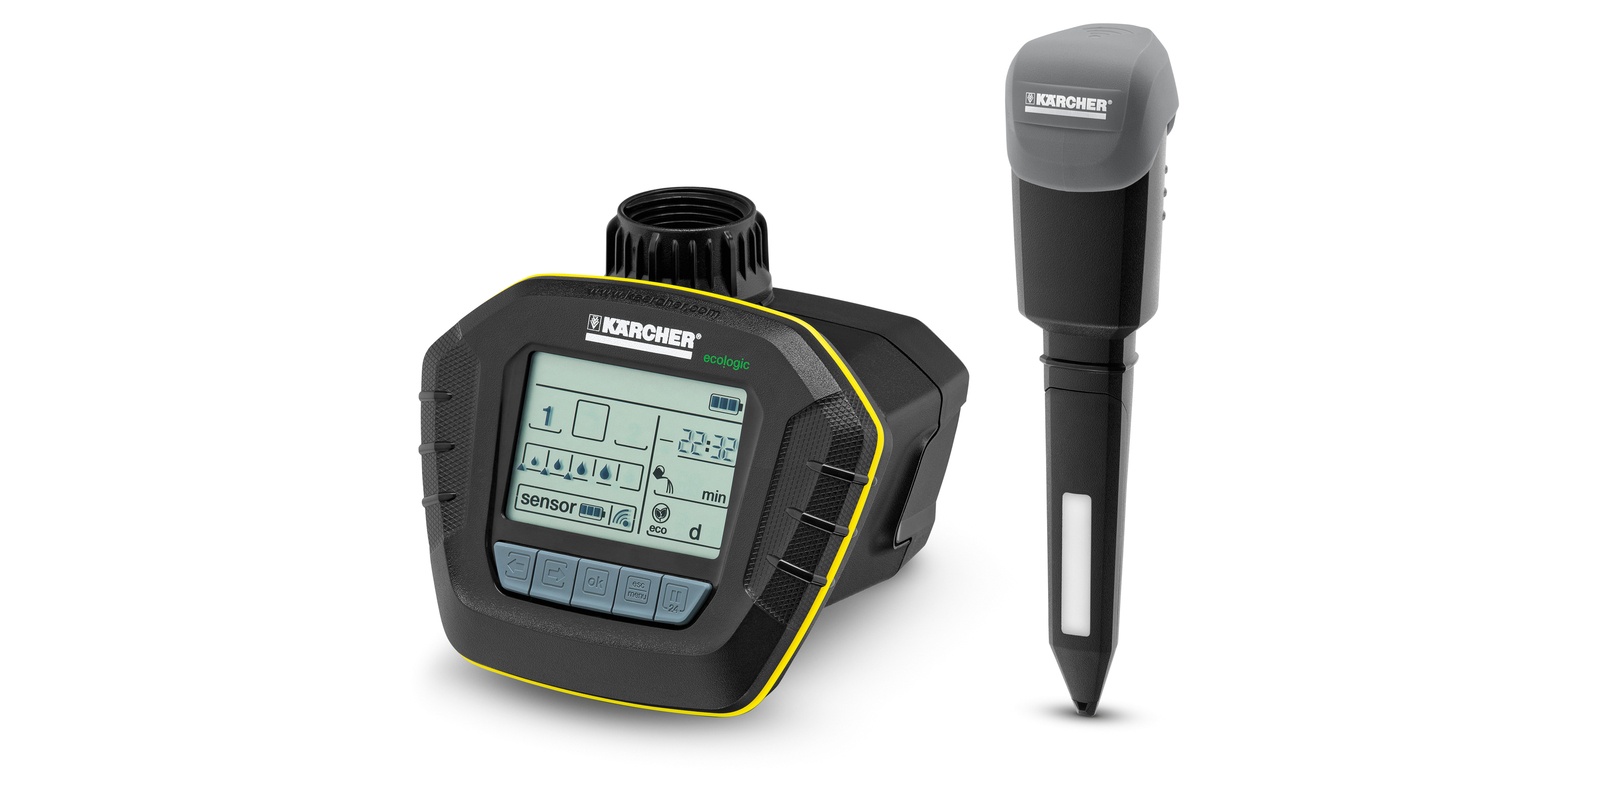
SensoTimer ST 6 eco!ogic
Using a radio sensor, the SensoTimer ST 6 eco!ogic intelligent water timer knows how much water plants need and waters them based on moisture levels. You can set up to two watering times per day. You can also delay watering by up to seven days with the eco!ogic function.


