Indoor Products
Vacuums
Filter bags can be purchased via our online shop at www.karcher.sg or by calling our dedicated Helpline team on (65) 6897-1811.
These bags can also be purchased via our dealers and retailers. For more information, click on this link.
Yes, Kärcher Multi-Purpose Vacs can be used both inside and out. The practical blower function on certain models is ideal for blowing away leaves.
Yes, you can use the cartridge filter for vacuuming liquids. Ensure to remove it and allow it to dry fully before vacuuming dusts. The foam cartridge is also suitable for wet applications. For further information on this product please contact the Kärcher helpline on +65 6897 1811
If Vacuuming fine dusts, we recommend using a filter bag. The dust will be collected within the bag and will eliminate the risk of it escaping from the vents on the unit.
Check the fuse and power outlet. If necessary, contact us directly.
Remove any blockages from the suction nozzle, suction pipe, handle and suction hose.
Replace the paper filter bag.
Replace the seals.
Make sure that the filter bag is correctly inserted. If the filter bag is damaged, replace it.
Check the HEPA filter, suction nozzle, suction pipe, filter bag and motor protection filter for blockages.
Replace the batteries if necessary. Establish a line of sight between the transmitter and receiver by pointing the bend of the handle towards the vacuum cleaner.
It depends on the debris and dust at each individual home, ideally we can recommend when the paper filter bag reaches 50% capacity.
Always straighten the hose and be more careful when hose against any sharp corners.
It is able to work or use to vacuum the whole house as long the filter bag isn’t full.
It can last up to many years. 5 years (+/-)
First charge for the battery is approx. 14 hours (overnight charge recommended). Operating time of a fully charge battery is 30mins max.
Subsequent charge of flat battery would be approx. 8 hours. Using a quick charger (optional accessory), charging time of flat battery is approx. 5.5 hours.
You should always work with an inserted foam or cartidge filter during wet and dry vacuuming.
Ensure the cartridge filter is clean by knocking off any dirt from the cartridge and rinsing it under running water. Do not wipe or brush down. Allow to dry completely prior to reusing.
The waste container may be full, please empty the container and check that the filter is not blocked.
If the cleaning power of the appliance deteriorates we recommend checking the following:
The accessories, suction hose or suction tubes are not clogged. If so, remove the obstruction using a stick or long object.
If the filter bag is full, remove and install a new one.
Check that the foam filter is not contaminated by cleaning it under running water.
Ensure the cartridge filter is clean, by knocking off any dirt from the cartridge and rinsing under running water if necessary. If the filter is damaged, then this should be replaced."
Wet and Dry Vacuums
You can use a multi-purpose vac for individual dry leaves, but not for large quantities of leaves. Hard or wet leaves can quickly lead to blockages in the suction hose or container inlet.
Level 2 is only used for operating power tools. The vacuum cleaner starts when the power tool is switched on and stays on for around 15-20 seconds after the power tool has been switched off.
When vacuuming fine dust, you should always use a filter bag.
Check that the suction hose is inserted properly and that there are no defects. Check that the filter is in place and that it is not defective. Use a filter bag.
The device switches itself off when the dirt receptacle is too full. If the filling level probe and casing are wet, this can cause a moisture path to form.
Allow the device to dry out and clean the filling level probe.
The Kärcher Wet and Dry Vac range should be used with a filter bag when dry vacuuming, this will protect and prolong the life of the filter. This will prevent the filter from becoming clogged with dust, lengthening its life. It also makes emptying the machine after use much easier.
The Kärcher Wet and Dry Vacs are designed for vacuuming purposes only. They will remove dust and dirt particles by sucking them from the surface, but they will not work as a spray extraction unit.
Check the fuse and socket and check the cord and plug for any damage. If the power switch, carbon brush or power outlet are defective, please contact us directly.
Remove the cartridge filter and empty the container. If there is water in the cartridge filter, allow this to dry.
Check the power outlet and please contact us directly.
No, you should not remove the filter and ideally fit with filter bag for dry vacuuming. The water in the tank will not be good enough to contain the dust & dirt.
Window Vac
The on/off switch on the Window Vac should be pressed directly in the middle on the WV50-WV75 and just below the green light on the WV2-WV5.
Should you experience any further difficulties, please contact our dedicated helpline team on 6897 1811 or email service@sg.karcher.com
This is an indication that the battery requires charging.
The Window Vac should be charged for a period of 2 hours to charge from empty. The machine is fully charged when the light stops flashing and remains illuminated.
The WV5 with exchangable batteries requires 3 hours to charge from empty.
If your window vacuum is not charging then you will need to check the following:
1. That the charger is fully plugged into the wall and the machine and the switch is turned on.
2. That the charger is not broken, if it is, then you will need a replacement.
3. The machine needs to be allowed to charge for up to 2 hours.
If your window vacuum still doesn’t charge, then please contact our dedicated customer service team on +65 6897 1811 or email service@sg.karcher.com who will be happy to advise further.
The serial number on the Window Vacuum is located behind the water tank. To access this, you will need to remove the neck section, by pushing the two black buttons in, and then pull the water tank away from the body.
The serial number is located in the first box of numbers.
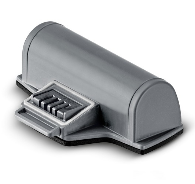
The WV5 which is the latest model of Window Vac is available with a removable battery.
The part number for this item is 2.633-123.0.
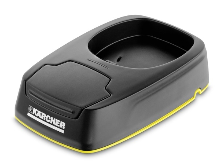
An additional charging station, part number 2.633-125.0, is also available which will hold the machine and an additional battery, allowing you to charge 2 batteries at the same time.
Unfortunately batteries are not available for the other Window Vacuums in the range.
The light on your window vacuum will slowly flash continually until the battery is fully charged. It can take on average 2 hours for the battery to fully charge from empty.
Once the battery is fully charged, the light will become solid. You should unplug your Window Vacuum at this point, do not over charge your machine.
To ensure the surface being cleaned is left spotless and streak-free, we recommend using the Karcher Glass Cleaner Concentrate found in our webshop.
The cleaner is designed for streak-free cleaning of all glass and mirror surfaces and will remove stubborn stains such as grease films, finger marks and emissions.
If using an alternative brand of glass cleaner or detergent we cannot guarantee the same results.
If the surface is not wet enough the rubber blades will leave a mark. It may also be due to previous detergents still residing on the window.
You should also ensure that the blades on the Vacuum are clean and the surface is free of any dirt residues.
To ensure that the Window Vac does not leak from the air vents, ensure that the liquid in the collection tank does not exceed the maximum marker level.
The Window Vac should be used in a vertical position, starting from the top of the window and using in a downwards motion.
If using the vac horizontally ensure that the water tank is emptied prior to use.
Check that the neck section and the intake tube in the dirty water tank are not block with dirt. Give them a thorough clean, allow to dry and try the machine again.
Yes. It is found in our online webshop
Pour all of the detergent concentrate supplied (20 ml) into the spray bottle supplied and fill it up with water.
Depending on how dirty the windowpane is, you may have to clean it several times. The cleaning agent solution should not be allowed to dry on while you do this.
Hold the window vac so that that the squeegee is perpendicular to the windowpane and do not use too much pressure.
We also recommend that you clean the squeegee regularly, removing any dirt residues. The squeegee can be pulled out sideways. If the squeegee is worn, it should be replaced.
Spray the windowpane so that it is moist all over.
Make sure that the dirty water tank is not too full, particularly if you are using the device in a horizontal position or above your head.
Charge the battery if the operating display is off or if it is flashing slowly. If the display is flashing quickly, please consult one of our service partners or contact us directly.
Fill it up with detergent. If the pump mechanism is defective, please send us an email at info@karcher-asia.com with a short description of the fault and proof of purchase.
Steam Cleaners / Ironing Stations
It may be difficult to remove the safety cap from the Steam Cleaner if the machine has not been de-pressurised after use, or if there is a build-up of limescale in the steam cap. Please see How do I depressurize my Steam Cleaner (Next Question) for further information.
When in use, a pressure control valve inside the safety cap locks in place, restricting the removal of the cap. This is a safety feature of the machine, preventing the escape of steam.
The safety lock cannot be opened as long as a slight pressure remains in the boiler.
After use, the following steps should be followed:
Step 1. Turn off the machine and disconnect the mains plug from the socket.
Step 2. Push the steam switch until steam discharge stops. The boiler of the appliance is now depressurized.
Step 3. Remove the cap and store separately from the machine.
*Please note that a residual amount of steam may be emitted when you open the safety lock. Be careful when opening the safety lock, if the machine has been in continuous use for a long time the safety cap may be hot.
A build-up of limescale can reduce the volume of steam being produced. For further information please see How to de-scale your Steam Cleaner (Next Question).
Instructions for De-scaling your Kärcher Steam Cleaner:
Step 1. Purchase a Kärcher de-scaling agent. Part Number 6.295-206.0 - RM descaler sticks 9x13 g.
Step 2. Dissolve the descaling stick into 1 litre of warm water.
Step 3. Pour the solution into the boiler and allow it to react for approximately 8 hours. Do not screw the safety lock onto the appliance while you are descaling.
Step 4. Create a separate solution for the steam cap.
Step 5. Clean the threads on the cap with a toothbrush and rub Vaseline around once clean.
Step 6. Once the descaling is completed, empty the solution from the machine. A small amount of solution will remain inside the boiler. Rinse the boiler 2 or 3 times with clean, cold water to remove any residues of the descaler.
You can use the Steam Cleaner to refresh the surface layer of your carpets or to spot clean, however the steam cleaner is not a deep carpet cleaner.
For the SC1 or SC2 Steamers, the water tank may be over full. Ensure that the tank is only 3/4 full. Ensure that the machine has reach operating pressure, if not, wait until the light indicates that the machine is ready. Ensure that the controller is set to steam mode.
The Steam cleaner can be used to clean the hob and the door of an oven. We do not advising cleaning the internals of the oven.
Regular cleaning is not only essential for kitchen hygiene, but it also contributes to the ongoing maintenance of your oven. There's no need to spend hours scrubbing with chemicals as the best way to clean an oven is actually with steam.
Textile care nozzle freshens and removes creases from clothes and fabrics and effectively removes odours. Practical textile care nozzle – the easy and space-saving way to quickly refresh and remove creases from hanging clothes and fabrics. Integrated fluff remover quickly removes adhering fluff.
You can use a steam cleaner with steam volume control (lowest level) to clean laminate or parquet flooring – provided it is not oiled or waxed! Use two cleaning cloths (= 4 layers) so that as little steam as possible comes into contact with the surface. Do not hold the nozzle in one place for a long time. Please make sure that no puddles form, as the residual moisture will then dry quickly and with streak-free results.
The steam cleaner can be used for many different cleaning tasks, for example, cleaning bathrooms, kitchens, crevices, drains, radiators and much more.
The temperature of the steam can vary significantly due to several factors, including the distance from the nozzle, the type of nozzle (e.g. floor or hand), and the surface being steamed. Past measurements from a hand nozzle showed surface temperatures of approximately 90 degrees Celsius at the point of impact, cooling almost immediately thereafter.
Although the steam temperature at this point of time is not 100 degrees Celsius anymore, it is still effective to kill 99.9% of bacteria on surfaces. For optimal cleaning and sanitisation, ensure the nozzle is as close to the surface as possible.
Every steam cleaner comes with two steam pipes as standard. The pipe can be easily extended with an additional pipe.
Demineralised water removes minerals from the boiler and damages it as a result. We therefore recommend using tap water. Please make sure to descale the device regularly.
Check the power cord and fuse, as well as the thermostat and pressure switch. Top up the water. If the water shortage light does not go off, please consult one of our service partners or contact us directly.
If the safety lock is stuck or spins round, allow the station to cool down and, if necessary, release the pressure by pulling the steam lever on the steam hose until the lock opens. If the lock cannot be opened in a cold state, please consult one of our service partners or contact us directly.
Descale the machine. If the heater is damaged, please consult one of our service partners or contact us directly.
The water shortage thermostat may be defective. Please consult one of our service partners or contact us directly.
Switch the heating on, plug the steam iron in, check the switch on the steam iron and replace it if necessary. If the solenoid valve does not open, please consult one of our service partners or contact us directly.
Please consult one of our service partners or contact us directly.
Allow the ironing station to heat up fully, set the controller to steam stage and fill the water tank just up to ¾ full.
Steam cleaner is good for cleaning in many areas, however it compliment mopping jobs.
It is more efficient for effortless cleaning and achieve better cleaning result to remove 99.9% bacteria without the use of chemicals.
Karcher steam cleaner can reach to 100°C in boiler.
Yes, it can be used however care should be taken to ensure that they are never used on unsealed wooden or parquet floors. Use minimum steam because water is the biggest enemy for wood and change the cotton cloth more often, when it gets too damp. If you are unsure whether your surface type is suitable for cleaning with steam, always seek guidance from the material manufacturer who should be able to advise the best cleaning means for that particular surface.
You can work until the boiler runs out of steam. Any refill has to wait till the boiler cooled down before you can open the boiler cap. We have Models that has secondary tank in which you can work continuously.
Steam cleaner kills/removes 99.9% of all common household bateria. It is not certified to kill dust mites or bed bugs.
NO! You cannot add any detergent/chemical/perfume into the steam cleaner.
"Yes you can use steam cleaner to clean the air-con coil but needs to be
cautious not to dent the coil fins. "
Your Kärcher steam cleaner is excellent for use all around the house including most fabrics however it is very important that you always check with the fabric manufacturer before cleaning any surface or material with steam.
Once you decide to start cleaning we would always recommend you test on a small discrete area to check the result. "
Ensure that the tank is only 3/4 full. Ensure that the machine has reach operating pressure, if not, wait until the light indicates that the machine is ready. Ensure that the controller is set to steam mode.
Robocleaners
For all repairs or further information on the Robocleaner please call the Kärcher helpline on +65 6897 1811 or email service@sg.karcher.com
Cordless Electric Brooms
Yes, the electric broom includes two brushes: one standard brush and one pet hair brush. Hair can be removed easily and hygienically from all floor coverings using the pet hair brush.
Charge the electric broom, making sure it is switched off, for at least 3½ hours. If the battery is still not charged after a charging time of 14 hours, please see one of our service partners or send us an email at service@sg.karcher.com with a short description of the fault and proof of purchase.
Charge the battery and clean the brush to remove any dirt (threads, etc.)
Charge the battery, clean the brush by removing any dirt or replace the brush if it is worn out.
Check the rollers, clean them or, if necessary, replace them.
Spray Extraction Cleaners
If the cord/plug or power switch are defective, please contact us directly.
Check the fuse in the electrical socket.
If the carbon brushes or suction turbine are defective, please contact us directly.
Remove any blockages from the suction nozzle, suction pipe, handle or suction hose.
Replace the seals in the vacuum system if they are not airtight.
Empty the dirty water tank.
Ensure that the transparent lid is fitted correctly.
The machine switches itself off during wet vacuum cleaning when the water level in the container is too high. Switch the machine off and empty the container.
Check whether there is a blockage in paper filter bag, flat pleated filter, nozzle, suction pipe or suction hose ("full" indicator is red).
Check whether the flat pleated filter is missing or is not inserted correctly.
Ensure that the suction hose is attached correctly and that the flat pleated filter is fitted correctly or replace it if necessary.
Fill the fresh water tank.
Clean or, if necessary, replace the float switch.
Clean the water hose/nozzle.
Clean the vacuum filter in the fresh water tank.
If the water pump is defective, please contact us directly.
Yes to all carpets except those carpets material which are very sensitive to water.
Warm water can helps to have better cleaning result but it cannot disinfect with extraction cleaner. Cleaning Agents may provide better results